So what do I do when I have a few days off? I play around with photoshop of course. They say that when you do what you love you’ll never work a day in your life, but the reverse is that you’ll also never really have a day off! Anyway, I thought it might be nice to do another photoshop tutorial, this time explaining the method I used on the photographs in yesterday’s post.
Eve and I were messing around yesterday afternoon, she was jumping on the bed and I was trying to snap a few shots of her in action. It was a cloudy afternoon and the light in the spare bedroom was dull. I needed a fast shutter speed to capture her so my ISO had to go up to 800 (even then the shots came out pretty blurry as you can see in the previous post) which means grainy photos from my 10D. In the end the results straight from the camera needed a bit of help. I shoot everything in RAW format (rather than JPG) which DSLRs allow you to do, this means that I have a lot more leeway when it comes to working with dodgy conditions…and if all that just stepped too far over the techy line for you just allow your eyes to glaze over and click on to the tutorial to see how I made the above image:
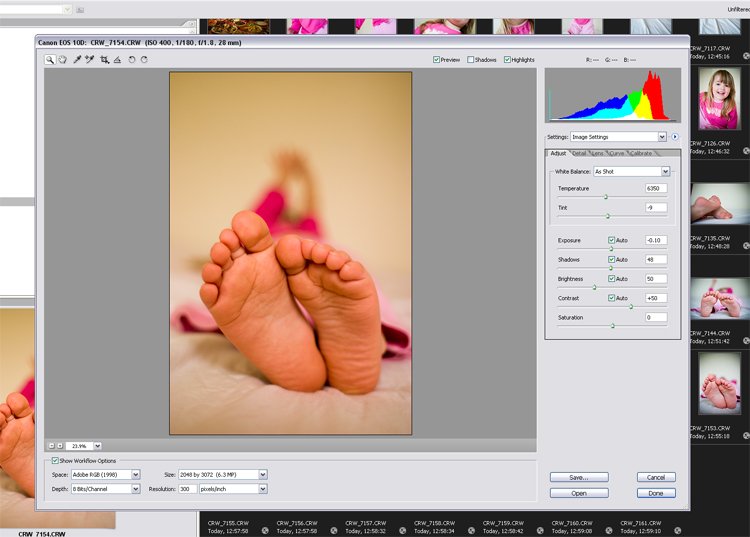
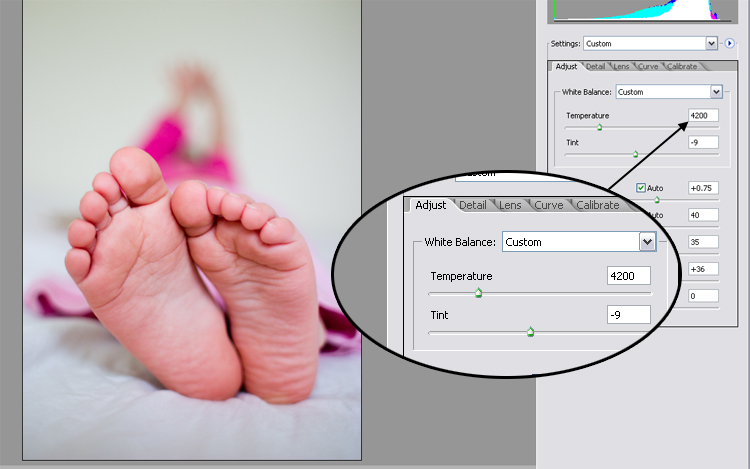
1. So, here’s the image as it appeared in Adobe Bridge. This is a programme that allows you to open up your files and view them in one place, sort of like Picasa, and it comes with Photoshop. You can also do some editing in Bridge before opening up in Photoshop and getting a bit more specific with the images. As you can see, the original photo was fairly dull. I liked the composition and the angle, but the colour was way too yellow. So, in Bridge, I turned the temperature down to something a little more natural-looking:
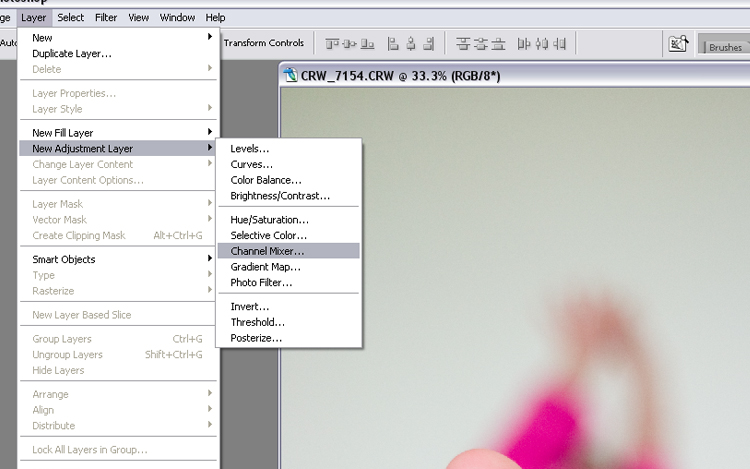
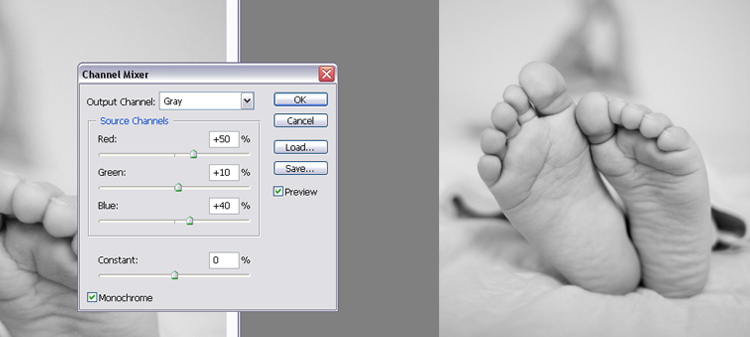
2. OK, I was happy with that so I went ahead and opened it in Photoshop (by clicking on the Open button in the same box where I just changed the temperature…this opens Photoshop automatically). Once the image was open in Photoshop I selected Layers>New Adjustment Layers>Channel Mixer from my menus:
In the Channel Mixer Box I turned the image to a neutral black and white with the following settings:
3. Next I created two Curves Layers (Layers>New Adjstment Layers>Curves) and gave them the following settings:
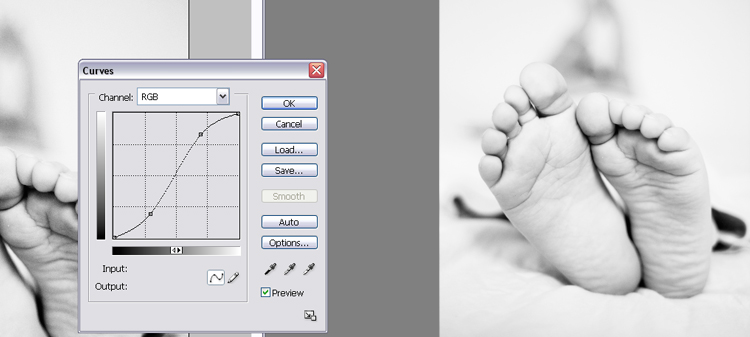
An S-curve for the first one.
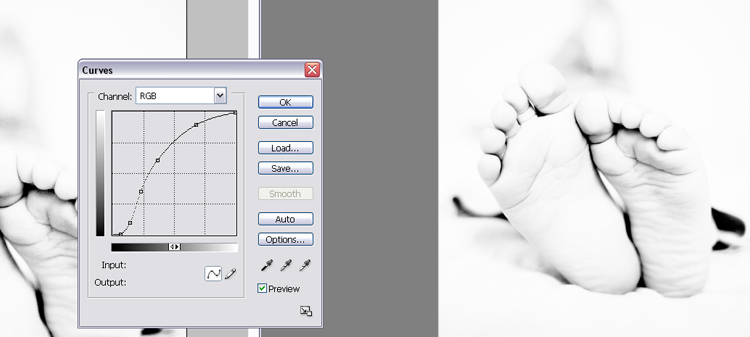
And a rounded shape for the second one.
4. The photo was looking pretty washed out at this stage so next I played around with adding colour and definition back into the image. At this point the Layers palette on the bottom right of the screen looked like this:
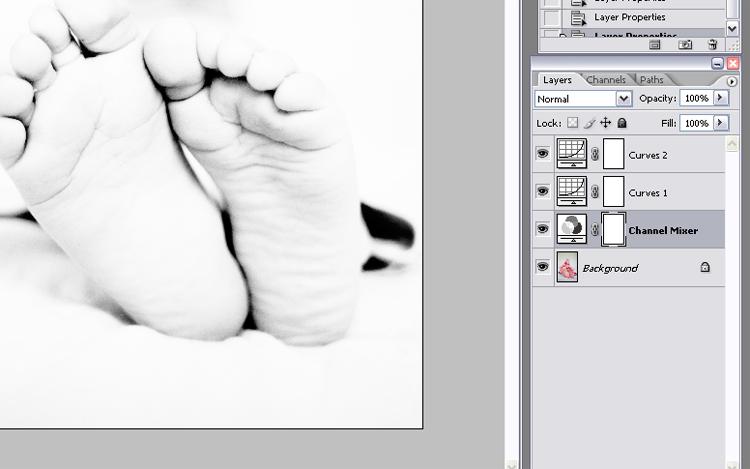
This is where using Adjustment Layers on top of the original background photo, rather than just changing the original itself, proved very useful. I started playing with the Opacity of the three different adjustment layers to get the definition, contrast and colour that I liked. It turned out that 60-65% on each layer gave me the effect I was going for.
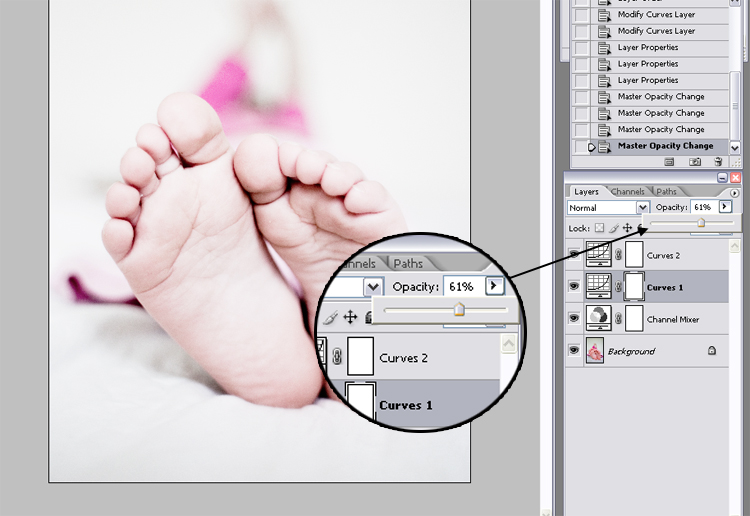
It’s a sort of antique-y, pale effect and I think it works for these images. Once I knew the settings worked for this image I went and applied them to the others from the previous post to give it a uniform theme.
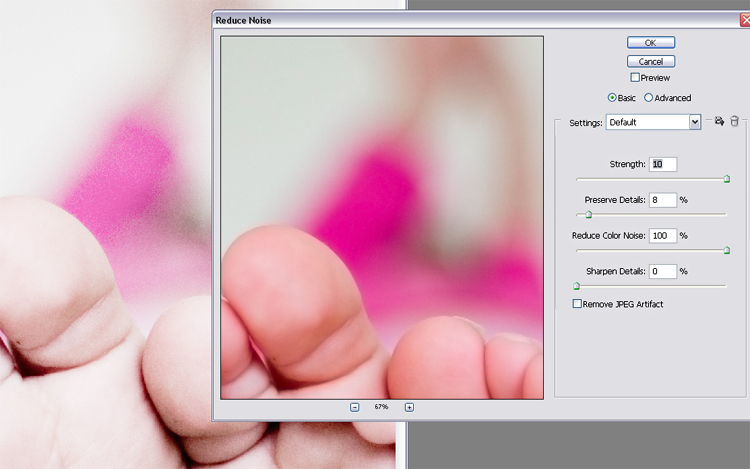
5. The final touch was to use Photoshop’s Reduce Noise filter on the background layer to take away some of the graininess that came from the low-light settings on my camera:
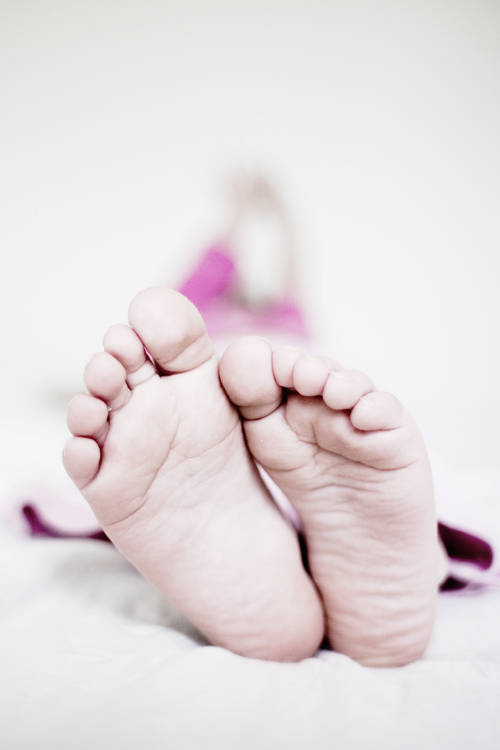
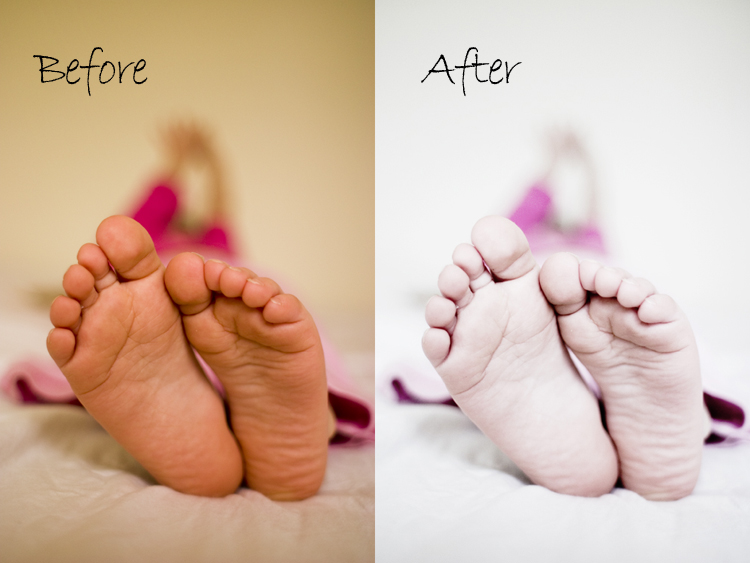
And here are the before and after images:
So, I hope that’s useful! Please leave me a comment and let me know what you think.
8 replies on “Lighten Up Photoshop Tutorial”
Thanks for this 🙂 As a total newbie to PS, all the tips are very much appreciated, I love the end result of this, and it worked perfectly for the series!
Nice little tutorial, but me being me, I prefer the photo before you played around with it! I almost never do anything with my photos after I take them, bar the odd red-eye removal.
Great tutorial Claire! I totally see what you mean about the first shot – nearly all the pics I take in my apartment have that yellow-y glow in them. I love, love, love the after shot – I’m just learning, but I’ve definitely developed a thing for high key photos!
I have been enjoying playing around with curves and the channel mixer, but hadn’t thought about doing multiple semi-opaque layers like that, really good tip, so thanks a mill.
You should seriously consider doing a one-day workshop!!
i haven’t used the channel mix much. i stumbled onto your blog… thanks for the PS tips.
Thank you very much for this tutorial. I enjoyed the way you do this, and I appreciate the step by step instructions for the ones who are experts in this software.
You’re really expert in using the software. I never taught some of your technic before. I will used it in my daily editing. Thanks
nice tut, thx 🙂
You really shouldn’t have lightened it so much. The child looks more like she’s albino then beautiful.